
Introduction
How to set a top-tech thermostat? Welcome to the world of smart thermostats, where the latest technological advances and customised peace of mind look forward to interesting and exciting experiences. We’ll tackle the complicated processes of configuring your brand-new smart thermostat with the help of this detailed guide, which you will be able to depend on. By challenging yourself, you’ll not only have mastered the art of temperature regulation but also release all the possibilities for a warm home atmosphere while limiting costs related to energy. Whether you’re a skilled IT pro or someone new to the world of smart gadgets, our step-by-step instructions are going to guarantee a perfect installation that maximises the benefits of your smart thermostat.
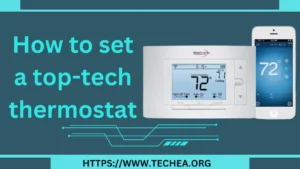
Let’s have a look at your smart thermostat.
A new way of life requires a fresh start, and smart thermostats are more than just gadgets. Here’s a brief overview of what’s coming up:
- Effortless Comfort: Say goodbye to the day when temperature changes were performed manually. As your own personal temperature concierge, your smart thermostat acquires knowledge about which temperatures suit you and adapts to your unique way of life.
- Energy Savings: Prepared for an energy demand paradigmatic transformation Your smart thermostat’s sophisticated programming algorithms optimise temperature control, resulting in significantly greater expenses for electricity and reductions in emissions.
- Remote Control: Your hands literally hold the power of control. Take advantage of your smartphone’s remote thermostat control feature to make sure your home is comfortable when you return on your investment.
- User-Friendly Interface: Keep your doubts about the word “smart” to yourself. These thermostats feature simple, user-friendly interfaces that have been developed with simplicity in mind.
Before the Fun Begins: Getting Prepared
Preparation and the right resources are both required for the installation to be successful. What exactly you need is as follows:
HVAC System Compatibility: Let’s Check
Start your next journey with a compatibility check. Your chosen smart thermostat must be working smoothly with the HVAC system in your home. To avoid any installation-related problems regarding compatibility, refer to the manufacturer’s specifications and suggestions for improvement.
Your Handy Toolkit for Success: What You Need
The installation process will go more smoothly if you have the right equipment on hand.
- Screwdriver: For the installation and wiring jobs, a Phillips-head screwdriver will be your trustworthy partner.
- Level: Making sure the supporting structure is level is the secret to level accuracy. It will be very important to have a bubble or digital level.
- Wire Labels: These insignificant labels will be really important for managing what is known as the installation’s electrical wiring executive management.
- Anchors and screws: These may be required to anchor the underside of the baseplate depending on the placement of your thermostat and wall.
- Smartphone with Wi-Fi connectivity: The final component of the connected experience is your smartphone, which is going to enable you to connect your thermostat to your internet connection via Wi-Fi.
Safety First: Turning Off Power for a Smooth Start
Never sacrifice safety for anything at all. Turning off the HVAC system’s source of electricity will allow you to start the installation process. Find the main circuit breaker for your HVAC system and turn it off. You will work in a secure environment free from electrical emergencies because of this preventative security measure.
Step 1: Unwrapping the Magic: Getting Started
Now that you’ve made all of your preparations, it’s time to start the wonderful process of opening your new smart thermostat and its parts.
1. Experience the excitement:
Allow the excitement of the potential problems to envelop you as you open your smart thermostat. A brand-new era of comfort in your home will soon be about getting started with your help in any way.
2. Identify all the important parts:
Spend a few moments getting comfortable with the package’s contents. Make sure you label each part, including the thermostat unit, baseplate, cables, screws, and any optional additional components.
3. Checking for Any Issues:
Check each component in detail for any warning signs of possible damage while being shipped. Make sure that the display has not been damaged, the buttons are functional, and there are no unmistakable cracks or faults by carefully looking at the thermostat unit of production.
Step 2: Saying Goodbye to the Old If you had one
This phase is going to guide you through the process that is required to prepare your current setup for the installation of the new tech thermostat if you’re making improvements to an old-fashioned thermostat.
Turning off HVAC power:
Disconnecting the power to your HVAC system is a highly important safety protection. Locate your home’s breaker box in the electrical panel, then the HVAC system switch. In order to make sure that no electrical current is being performed to your thermostat, turn the switch to the “off” position.
Removing Your Old Thermostat Cover:
To see the terminal connections and underlying wiring of your old thermostat, gently remove the protective covering. Your new smart thermostat’s wiring will be built on top of this.
Labelling Those Wires Carefully:
Carefully name each wire as you remove it from the previous thermostat. Each wire should have a label attached with the name of the terminal. When attaching the electrical wiring to the new thermostat, this level of attention to detail will be helpful in many ways.
Step 3: Creating a Strong Base: Mounting the Plate
For the smart thermostat you are using to operate properly with accuracy, you must make a secure, level baseplate. Everything that is needed is set up in this step for the actual installation of the thermostat unit in production.
Finding the Perfect Wall Spot:
Choose the best location for your smart thermostat on the wall before you go ahead and install the baseplate that comes with it. The most suitable position within the room, avoiding direct sunlight, and setting it up at a comfortable height are all things to think about as much as possible.
Using a Level to Make It Perfect:
A level base plate must be obtained, respectively. Your thermostat will be correctly positioned with the help of an electronic bubble level or digital level, minimising temperature variations brought on by an unevenly shaped installation process.
Getting Ready to Secure the Baseplate
Hold the surface of the baseplate against the wall where you’ve decided to place it. Make a note of the locations where the baseplate-securing screws will be placed. To use as a point of reference, lightly mark these locations with a piece of paper or pencil.
Attaching the baseplate:
It’s time to fasten the baseplate to the wall now that the positions have been indicated. Use the screws and anchors that came with your kit for a smart thermostat. To completely attach the baseplate to the wall, line up the holes in the baseplate with the specified locations, and then carefully insert the screws and anchors to hold them.
Step 4: Connecting the Dots: Wiring Your Thermostat
To wire your smart thermostat, connect the current HVAC system wires to the thermostat terminals. At the moment of greatest need, you have to create a link between your thermostat and your air conditioning and heating equipment that saves energy.
Matching Wires to Terminals:
When removing cables from the old thermostat, make reference to the labelling you already reated. Connect each wire with a label to the right terminal on the new smart thermostat. With such reliability, any mistake is avoided, and each wire is attached to the proper terminal.
Putting the Wires in Place:
Once the wires and terminals have been matched, carefully place each wire in the most suitable terminal on the smart thermostat. Always make sure that each wire has been securely secured inside each terminal for a solid connection.
Tightening Those Screws Just Right
It’s time to secure the cables now that they are in position. The terminal screws should be properly adjusted with a screwdriver to tighten them. Avoid tightening the screws too much to avoid the possibility of harming the terminals or wires. You want to make sure the connection is secure and trustworthy.
Step 5: The Grand Finale: Attaching Your Thermostat
It’s time to fasten the smart thermostat unit to its provided location after the electrical wiring has been installed and the baseplate of the thermostat has been fixed carefully. In the installation procedure, this is an extremely important turning point.
Making Sure It Lines Up:
Hold the smart thermostat unit above the surface of the baseplate, making sure it has been placed correctly to fit into the holes and connectors. Spend some time positioning it correctly for your connection to be safe.
Snapping It Securely in Place:
Set up the thermostat unit, then carefully press down on it. The baseplate is firmly attached to the unit with an exciting click. The unit is correctly connected and prepared for use when you hear this press the button.
Step 6: Power Up and Get Going: Initial Setup
After the physical installation is complete, it’s time to turn on your smart thermostat, get started with the first configuration process, and lay the foundation for the best possible temperature control over the machine.
Turning on HVAC Power:
Return to the circuit breaker panel and activate the power to your HVAC system. The way it works reconnects your thermostat to your home’s cooling and heating structures and systems.
Following the prompts:
When you turn on your smart thermostat, the touchscreen display will proceed to guide you through the first setup. To guarantee proper arrangement, as well as carefully following the directions displayed on the screen.
Setting Time, Date, and Preferences:
During the setup process, you will be required to provide important information such as the current time, date, and personal temperature preferences. These settings create the foundation for your thermostat’s operation.
Step 7: Connecting to Wi-Fi and Bringing Your Thermostat Online
You gain more control and availability by connecting your smart thermostat to the internet. This stage connects your thermostat to your home’s Wi-Fi network, making it possible for you to manage and access it remotely.
Locating the Wi-Fi Settings:
To find the Wi-Fi options, find their way through the menu on your thermostat’s display. You’ll start the connection process from this menu.
Choosing and Adding the Password
Select your home network from the list of available options in the Wi-Fi settings. In order to connect your thermostat to your network, enter your username and password for Wi-Fi correctly.
Waiting for the Signal
Your thermostat is now ready to connect to the system after you enter the password. It may take some time for the device to connect to your network to create a secure connection.
Step 8: Becoming Friends with Your Thermostat
It’s time to get comfortable with your smart thermostat’s user experience functionality and advanced features now that they’re online and linked to one another.
1. Getting to Know the Interface
Spend some time exploring the thermostat’s user interface. Learn about the layout, buttons, and settings that are available to you in any way possible.
2. Playing with Temperatures, Modes, and Schedules
Experiment with different temperature settings, switching between heating and cooling modes, and building simple plans for many different moments of the day.
3. Exploring Advanced Features:
Understand the advanced functions of your smart thermostat. These may feature GPS tracking, which changes your home’s temperature based on your location, and learning abilities that change according to your daily activities and personal preferences.
FAQs: How to set a top-tech thermostat

To answer common issues and doubts, explore the most frequently asked questions.
Is this simple to do even if I’m not a techie?
Absolutely. The installation process has been simplified, and our detailed guide will help you through each step. As long as you properly follow the directions and work out careful consideration the technique is reasonable.
Should I do it myself or hire someone?
Whether you’re an experienced DIY interest or fresh to the world of installations, the option is yours. You should be able to complete this project on your own if you’re familiar with tools and instructions. However, if you are confused or uneasy, chances are going into a specialist is a good idea.
Oops, My Thermostat Isn’t Turning On—What Now?
Don’t be worried if your smart thermostat does not turn on after installation. Start by checking the wiring and making sure each wire is securely attached to its correct circuit. If the issue keeps happening, see the manufacturer’s solving problems guide or contact the customer service staff.
Can I Return to My Old Thermostat if I Change My Mind?
Certainly. If you ever want to go back to your old thermostat, the process can be reversed. To change the process, just disconnect the smart thermostat and connect the wires to your old thermostat.
Help with Wi-Fi Issues: Any Tips for Fixing Them?
Wi-Fi connectivity problems could happen, but they are usually fixable. Check that you entered the right Wi-Fi password during the setup process. To ensure a stable connection, keep your thermostat within a reasonable range of your Wi-Fi router. If the problem remains, contact the instructions provided by the manufacturer or support resources for help in fixing the issue to your satisfaction.
Expert Tips for Getting the Most Out of Your Thermostat
To make the most out of your smart thermostat, seek professional help.
1. Finding the Right Spot:
Consider variables such as avoiding direct sunlight, draughts, and heat sources when choosing where to put your thermostat. This allows for accurate temperature measurements to be taken and the best possible performance.
2. Keeping Your Thermostat Software Current:
Regular software updates are required. Keep up to speed on the latest manufacturer changes and upgrades, and make sure the software on your thermostat is up-to-date.
3. Crafting the Perfect Temperature Schedule:
Experiment with creating temperature techniques that fit seamlessly with your everyday schedule. Fine-tune the settings to achieve the best mix of comfort and energy efficiency.
Conclusion: Your Journey to Tech-Thermostat Happiness

As you close out this guide, you’ll have the knowledge and skills you need to set up your smart thermostat and usher in an exciting new phase of comfort and savings in your home. You’ve easily handled each stage, from understanding the magic within the box to connecting to Wi-Fi and exploring advanced features. You’re now ready to enjoy the benefits of having the ability to change the temperature of your house at your fingertips. Your smart thermostat is more than a device; it is a friend who supports you on your journey to a more comfortable and energy-efficient lifestyle. So bask in the warmth, rejoice in the ease, and enjoy the wonderful transformation you’ve brought into your living area.


1 thought on “How to set a top-tech thermostat”